I have some texts that I want to send to ChatGPT for editing and translation. This is a way to do that. This post is a way for me to document what I did and maybe you find it useful if you happen to find it.
The texts that I want to input are written in a mix of Dutch and English so I want to be able to tell ChatGPT to fix that and then translate it into English.
You can obtain more advanced functionality with a custom GPT but the disadvantage there is that you need a pro license for each person using that. With this solution you can share the functionality on a private server or to authorised users and decide how you want to pay for the API usage.
Requirements
- WordPress (duh)
- Formidableforms plugin
- Formidable API addon
- A ChatGPT API key
Create a form
Create a form that has at least three fields:
- Input (Invoer)
- Answer (Antwoord)
- Instructions (Instructions)

Input:
You can set the Input field to type “rich text” (if you have the pro version of Formidableforms). This looks nice later on but with the disadvantage that the rich text field does not have the “auto grow” option that the normal text field does have. Your choice.
Answer:
I will use this field later to save the API reply from chatgpt.
It is a standard text field with the auto grow option enabled.
This requires the use of a code snippet that I will cover later.
Instructions:
This is the part where you tell chatgpt what to do.
- Use a standard text field with the “Auto Grow” option enabled.
- Put the default instruction that you want to pass to chatgpt in the “Default Value” and let the user edit this if they want.
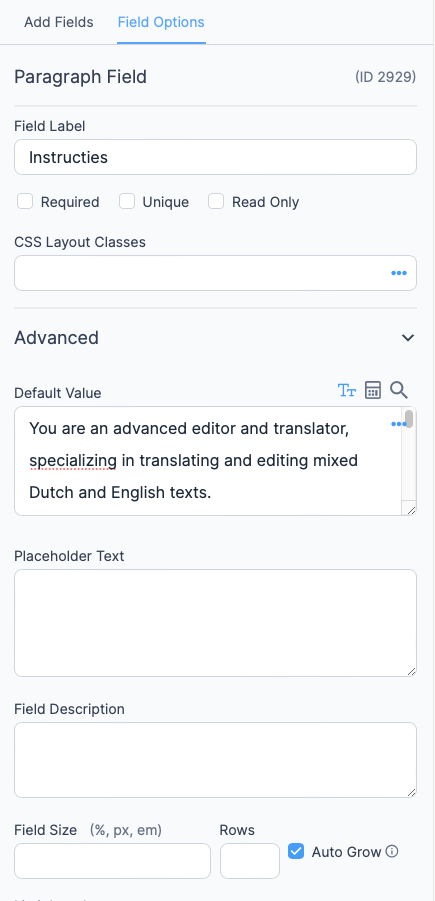
The actual instructions are a lot longer than that.
Figure out a good prompt, it is the sauce that makes this thing awesome.
Form options – sending the input to chatgpt
This is where you need the API addon. Go to the form settings and add an API action. I called mine “Zend data naar ChatGPT”.

Configure the API action
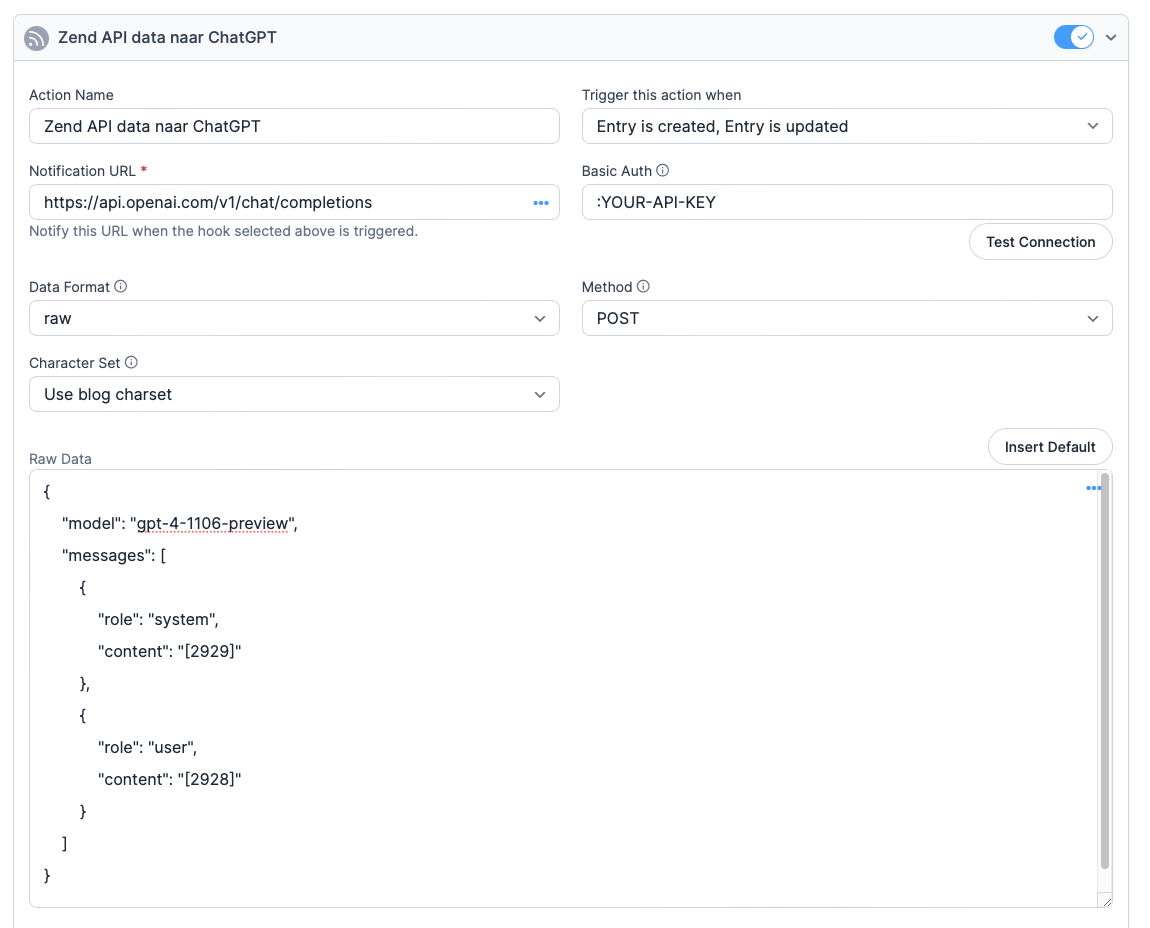
Action name:
Whatever you want. I choose “Zend data naar ChatGPT”.
Trigger:
Set this to “Entry is created” and “Entry is updated”.
This will allow you to publish the result on a view later and offer to option to edit the entry and allow the user to fine tune the input and the instructions.
The howto I will post later along with the code snippet for the API answer.
Notification URL
Use this:
https://api.openai.com/v1/chat/completions
Basic Auth:
Ok here comes one of the interesting bits.
In the API docs it states that you should use something called “bearer authorization” but you cannot put that in here.
However, if you dig a little deeper you will find that you can do it like this:
In Basic Auth, leave the username empty and just write a colon followed by your API key.
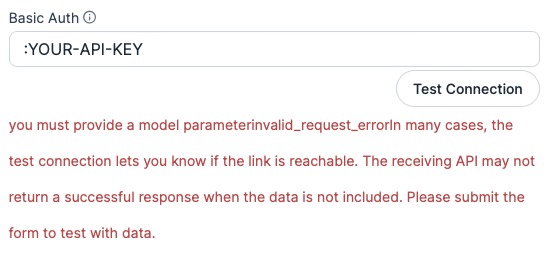
Even if you insert the actual API key here the test connection fails but THE API WILL WORK.
Data Format:
- raw
Method:
- POST (= default)
Character Set:
- Use blog charset (= default)
Raw Data:
You now need some JSON code. Put this in:
{
    "model": "gpt-4-1106-preview",
    "messages": [
        {
            "role": "system",
            "content": "[2929]"
        },
        {
            "role": "user",
            "content": "[2928]"
        }
    ]
}
I used the latest preview model of today but that can change. Look for the model names here.
Replace [2929] in
“role”: “system”,
“content”: “[2929]”
with the field number of field that contains the instructions.
Replace [2928] in
“role”: “user”,
“content”: “[2928]”
with the field number of field that contains the input.
Save the options, you’re done.
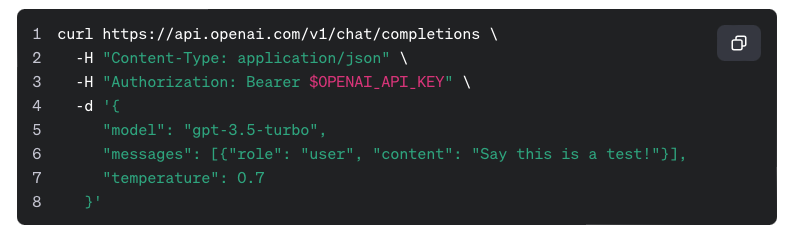
Chatgpt API reference
Look here for the docs.
Where do you put the answer field id number